Nigezza Creates aka Gez, Independent Stampin' Up® Demonstrator
Thank you so much for visiting my blog today, I am doing something a bit different today. There is a video to accompany this blog post and what I am doing is showing you how I mark up my trimmer and see other top tips for it.
The Trimmer
I love my trimmer, it is the best trimmer I have ever owned and it was on top of the list of my starter kit and I just couldn't wait to get it. I also love that you can score with the trimmer so that means if you are just starting out then it saves you money on buying a score board.
Marking up my trimmer
I like to have marks on the trimmer to show me very quickly where to cut my card bases and mats. These marks are for use with UK A4 size card stock. It can easily be adjusted to fit other size card stock.
- The blue mark is for half a standard A4 sheet in both landscape and portrait
- The green mark is the first mat size
- The pink mark is the double mat size
I like to cut my mats 1/4" smaller all around so it leaves a 1/8" border.
The Blue marks
- 5 7/8"
- 4 1/8"
The Green marks
- 5 5/8"
- 3 7/8"
The Pink Marks
- 5 3/8"
- 3 5/8"
Tip for cutting smaller strips
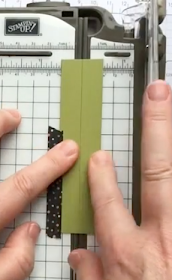
I use washy tape if I am cutting small strip. The washy holds the card stock in place while I cut. I always have a strip of washy stuck to my trimmer.
Tip for seeing the measurements on the centre arm
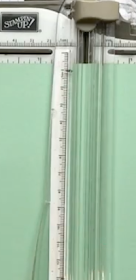
It is quite hard to see the measurements on the centre arm so I have stuck some white paper on the underside so I can read it better.
Trimmer Storage
I know quite a lot of people who have not realised that there is a storage section underneath the trimmer! Very handy for keeping spare blades.
Changing the blades
It may be easier to watch the video than read this! But basically you put the blade to the bottom of the track where there is a section that has a larger aperture, you then just pull it out, sometimes it is easy to do and sometimes you may need something to help lever it out. Then to replace drop the new blade in the hold and snap in place.
Cleaning the track
From time to time the track will need to be cleared of the paper fibres that build up in it. I run my pokey tool down it, sometimes I wrap some paper towel soaked in rubbing alcohol around it.
How long do the blades last?
It does depend on how often you use it. I have never actually timed how long one lasts but probably 3-4 months and I craft every day. It is important to use the trimmer on a flat surface, to press lightly when pulling it towards you or away from you. I often start my cut in the middle of the card stock if the blade is getting a bit old. Some people also swear by cutting kitchen foil to give the blades a bit of extra life when they are wearing out.
Video
I do hope you found that useful. I will be back soon with another project, until then ...
Happy Crafting!
Gez xxx
Please remember to use my host code so I can send you some FREE product as a thank you for shopping with me :-)
My Shop
My shop is open 24/7 Click here to shop!
Don't forget to use my host code to receive a share of the Stampin' rewards as a thank you for shopping with me :-)
Don't forget to use my host code to receive a share of the Stampin' rewards as a thank you for shopping with me :-)
Host code is FDC43URK
My Team
- Click here to join my team!
- No obligation to sell, make videos, blog etc
- You can just join up and get the 20% discount for yourself
- If you want to start a business for £99 then this is the way to do it!
- Chose £130 of products for £99
- You also receive a business pack to get you started
- 2 months FREE online shop
- Support from me and the wider team when you join my team
- I am also a Pootler which is Pootles team (Sam)
- You will also become one of these when you join with me


Thanks for sharing this Gez, I hadn't thought of using my Stampin Blends to mark my trimmer. xx
ReplyDelete