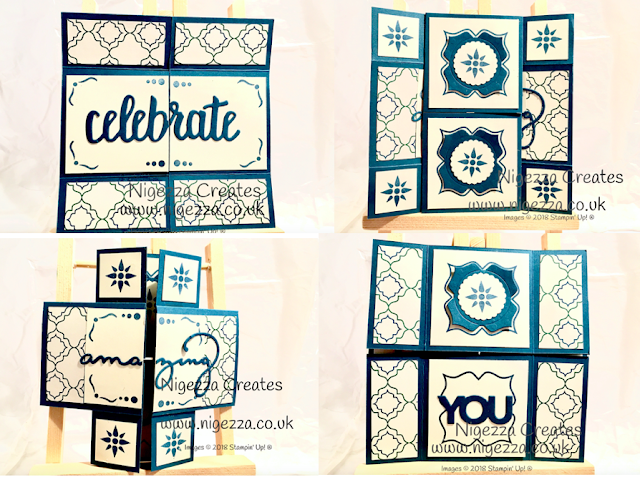
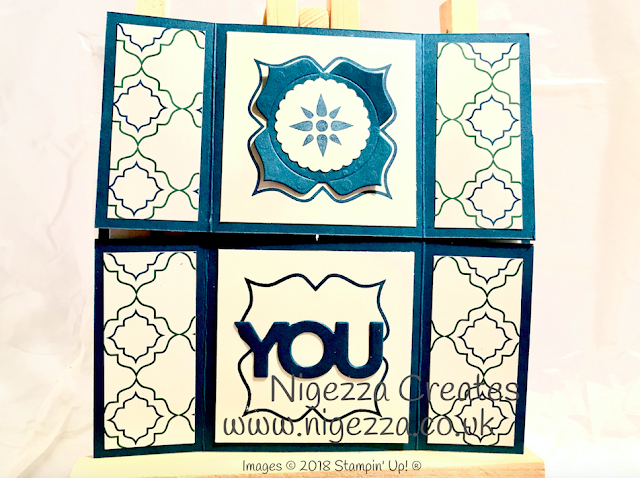
Hi and welcome to the inspireINK blog hop. This month the theme is Fancy Fold Cards. I have used the FREE Sale-A-Bration Thinlit Dies for this card and the Eastern Palace suite. I love this suite and have neglected it recently.
There are many tutorials on YouTube for making an endless card, I have sized this one so it can me made using a sheet of A4. A lot of tutorials use 12x12 cardstock so I wanted to make one that used a standard piece of cardstock.
Measurements
Card base:
- 2 x Dapper Denim cardstock 5"x5"
- Score both squares @ 1 1/4" from each end
- Cut squares in half so you have 4 rectangles 2 1/2" x 5"
Mats
First face of card- 2 x Eastern Palace DSP 1"x 2 1/4"
- 2 x Very Vanilla Cardstock 2 1/4" x 2 3/8"
- Scrap of Dapper Denim to cut the 'Celebrate' from
Second face of card
- 4 x Very Vanilla Cardstock 1"x1"
- 2 x Very Vanilla Cardstock 2 1/4" x 2 1/4"
- 2 x Eastern Palace DSP 1"x 2 1/4"
- Scrap of Dapper Denim to cut the Eastern Medallion
- Scrap of Very Vanilla to cut the scallop circle using 1 1/8" Scallop Circle Punch
 |
| Add caption |
Third face of card
- 4 x Very Vanilla Cardstock 1"x1"
- 2 x Very Vanilla Cardstock 2 1/4" x 1 3/8"
- Scrap of Dapper Denim to cut the 'amazing' from
Forth face of card
Assembling the card
- This card can be made in different sizes as long as the width of each rectangle is half the size of the length e.g. 3" x 6" or 3 1/2" x 7" or 4"x 8" etc also remember to adjust the score line to be 1/4 of the length e.g. for 6" score @ 1 1/2", 8" score @ 2"
- Fold and burnish all score lines
- Lay rectangles in pairs next to each other but at right angles to each other
- The folds should be faced down on one pair and faced up with the other pair
- Put adhesive - I used Tombow - in each corner to the half way point
- I drew a line 1 1/4" along so I knew where to place the glue
- Stick the top rectangles to the bottom rectangles
- Make sure they are flush at each corner
 |
- Once stuck run the bone folder over the scored lines
- Fold out the centre flaps to form new square and again burnish with bone folder
- Fold out again to form another new shape (sort of cross) and again burnish with bone folder
- Fold out again to form new square - this is the last square, again burnish with bone folder
- Carry on folding out the card to loosen it and making sure it flips well
- if it catches at any point you may need to trip slightly
Now decorate each face of the squares as shown in the pictures.
I have made a video tutorial so if you pop back to my blog tomorrow you will see the video tutorial linked here.
I hope you liked this project and are enjoying the other fancy fold projects in the hop. Now please click on the next button below to see the next blog.
Thanks for joining me today
Gez x


Fab card Get, I love it!
ReplyDeleteThank you Karen, I enjoyed making it :-)
DeleteAmazing card Gez xx
ReplyDeleteThanks, I really enjoyed doing it - it is the first endless card I have made :-)
DeleteGreat Card Gez, Not made an endless card yet. always used to get confused with what goes were. lol
ReplyDeleteThanks Angeline, after watching a few tutorials I realised they were actually quite straight forward. This is my first and I am sure I will do more. Give it a go :-)
DeleteReally great card and fabulous instructions x
ReplyDeleteThank you Janice, this card needs good instructions but it really is quite straight forward. :-)
DeleteBeautiful Card, There are so many type of fancy fold cards, aren't there!? I've seen this type before, but haven't made it yet. your simple instructions make me to make one!
ReplyDeleteThank you for sharing.
Jerim xxx
Thanks Jerim, they are really easy to do but look so complicated and clever, whoever you give this to will be amazed so go on make one :-)
DeleteLove your card and I'm definitely going to make one. As soon as I've finished hopping I'm going to watch the video. Dee x
ReplyDeleteThanks Dee, would love to see your card when it is done :-)
DeleteThanks for sharing in inches, just may try this one with a friend next week.
ReplyDeleteMy pleasure. I only work in inches still old school! I'd love to see your cards when they are done :-)
DeleteSomehow I missed you yesterday... Love your never ending card. I had forgotten these engineering masterpieces. X
ReplyDeleteThank you Verity, they are amazing aren't they - when I first saw one I though OMG thats amazing - they make us look really clever!
DeleteLove how you made it smaller. Your directions are so clear, too. By chance do you have directions available to print off? I would love to have a copy, if possible. Thank you for your time.
ReplyDeleteThank you Heidi, you could just print the blog post, but I have just created a google doc - never done this before so not sure if it will work! I have taken out the photos so it fits on 2 pages if that helps. https://docs.google.com/document/d/1O4IUnHCm1A6r33b_szl4EpKOLwkGX0C7pRyjKDTu3Jc/edit?usp=sharing
DeletePlease let me know if this works :-)
I tried 3 other videos on YouTube and was unable to get the never ending card right. Then I found yours and the instructions were wonderful. So clear! I love how the card came out. Thank you so much!
ReplyDeleteOh I am so pleased to read this - I also watched quite a few videos to see how it was done and some were a bit complicated so I tried really hard to show how pretty straight forward they can be. Thanks for letting me know :-)
DeleteI’m going to try this it looks like you really made it easy thank you for your time and efforts to do this for us.
ReplyDeleteThank you Donna, I hope you manage to make one - would be good to see it when you do :-)
Delete